Table of Content
Chapter 6 – Introducing Ruby on Rails
Introducing Ruby on Rails
In previous chapters, we focused on client side technology. They are technology that runs in web browser. They are HTML, CSS and some JavaScript. These tech focus on displaying content in an organised and stylish way.
In this chapter, we move to server. Server is respond to serve content file to client side browser.
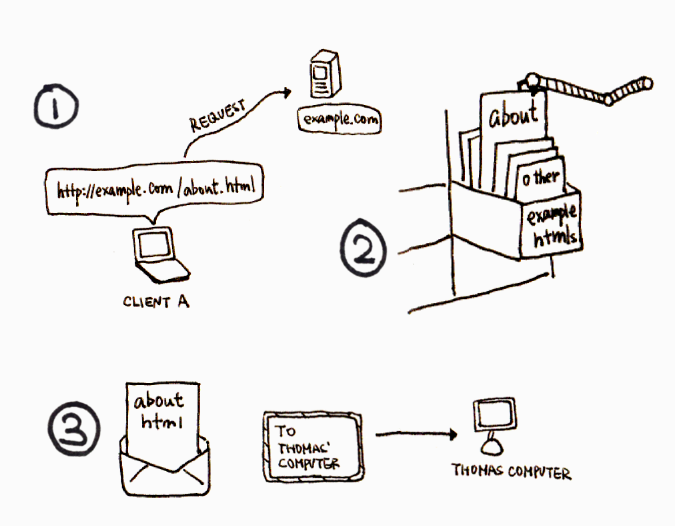
For static file, any server should work. So we focus on dynamic content creation.

MVC
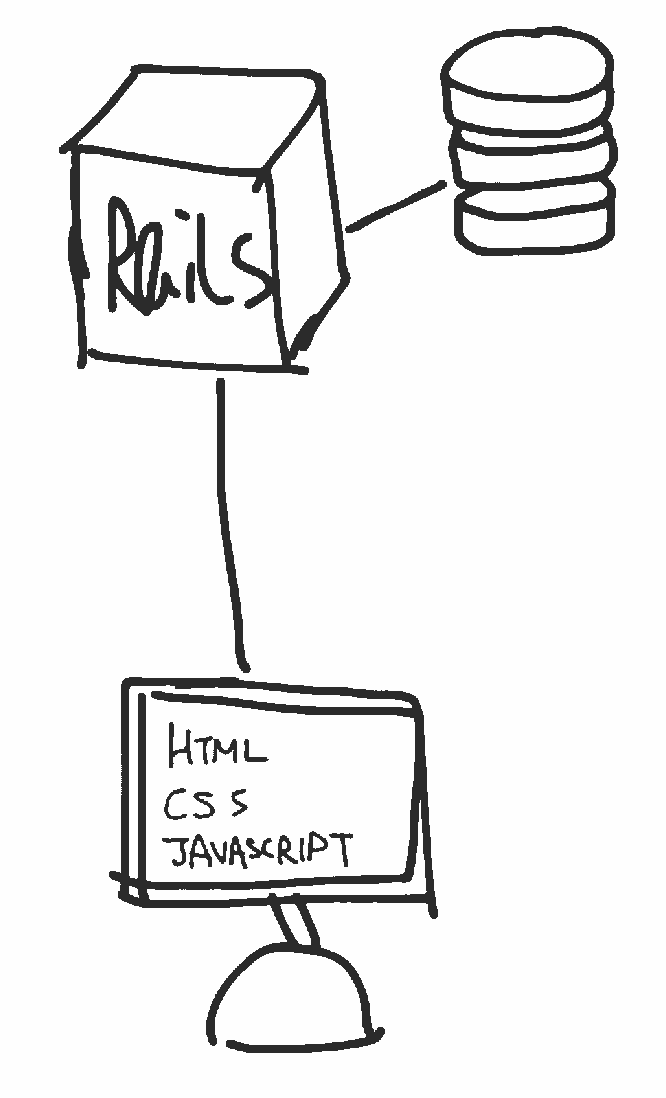
Rails makes uses of a programming design pattern called MVC. It stands for Model-View-Controller.
View is the generated file for client. In browser, this is the HTML file. Model is the data logic. No matter the data is in database, files, memory. Access and processing data is the model’s job.
Controller is the logic for each request from client side. For example, when a request is to get all news recently. The controller gets the requests, ask model to get all news recently. The controller pauses the data returned from model to the view. The view file decides how this data displays.
For example, view may loop the news and displays a list of news title. Or it may displays both title and content.
So basically, we think about how the data is manipulated. Then define the data access in modal and define how the data is displayed in views. Controller should not contain too much logics. It’s the bridge between modal and view. Or a thin layer between them.
Setting up the environment
The development environment requires Ruby development runtime. Ruby comes with a gem bundlers, which is a plugin system. Rails actually is a gem. So we can install rails by using gem install command.
Note: After you get familiar with rails development environment, you may want to use Ruby versioning system, such as rvm or rbenv.
![]()
Online IDE is a way to quickly get started without worrying much about the local development environment. We use Nitrous.io online development service.


Now nevigate to Nitrous.io and register an account. After registration:
- Click “Open Dashboard” if we are at home page.
- Click “New Box” to create a new development box.
- Choose “Ruby/Rails” and leave other options default.
- Click “Start” to boot up the virtual machine we just created.
- Click “IDE” to get into the coding environment.
Example App – Simple customer relationship management (CRM)
In this chapter, we will create a simple customer relationship management system. There are only two types of data: customer and note.
We store the following information for each customer:
1name, birthday, gender, tel
We may add notes to each customer. So here is what each note should store:
1note content, creation time
Notes are associated to customer. To do that, we store a customer_id on each note.
In Rails, each modal definition comes with the following default fields:
id– unique to identify object within the data set.created_at– the date time of this data creation.updated_at– when does this data last updated?
In this kind of Customer-Note relationship, we call it one-to-many. One customer can have many notes and any one note is belong to one customer.
Steps to create the app:
- Create new rails app
- Rails generate scaffold Customer …
- Rails generate scaffold Note
- Modify the note to make it belongs to Customer
- List notes in Customer view
- Done
Creating new app
We create a new rails app by using the following command.
1rails new <app name>
Running this command will create a new folder with the given name. All files of the rails project are created inside this folder.
Take a look at the created project folder and the files generated.
Here are the purpose of the generated files and folders, quoted from the official guide:
| app | Contains the controllers, models, views, helpers, mailers and assets for your application. You'll focus on this folder for the remainder of this guide. |
| config | Configure your application's routes, database, and more. This is covered in more detail in Configuring Rails Applications. |
| db | Contains your current database schema, as well as the database migrations. |
| Gemfile / Gemfile.lock | These files allow you to specify what gem dependencies are needed for your Rails application. These files are used by the Bundler gem. For more information about Bundler, see the Bundler website. |
| lib | Extended modules for your application. |
| log | Application log files. |
| public | The only folder seen by the world as-is. Contains static files and compiled assets. |
| tmp | Temporary files (like cache, pid, and session files). |
| vendor | A place for all third-party code. In a typical Rails application this includes vendored gems. |
Testing the web app
Execute the following command.
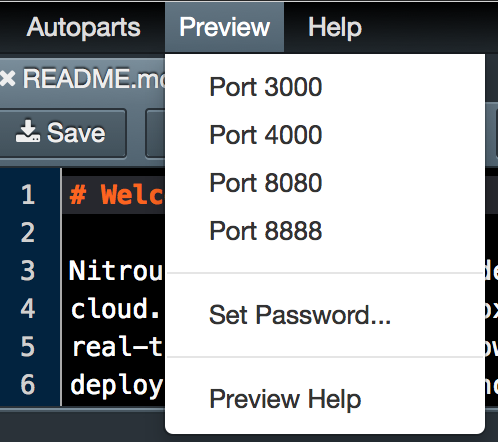
1$ rails server -p 8080
Click “Preview” > “port 8080”.
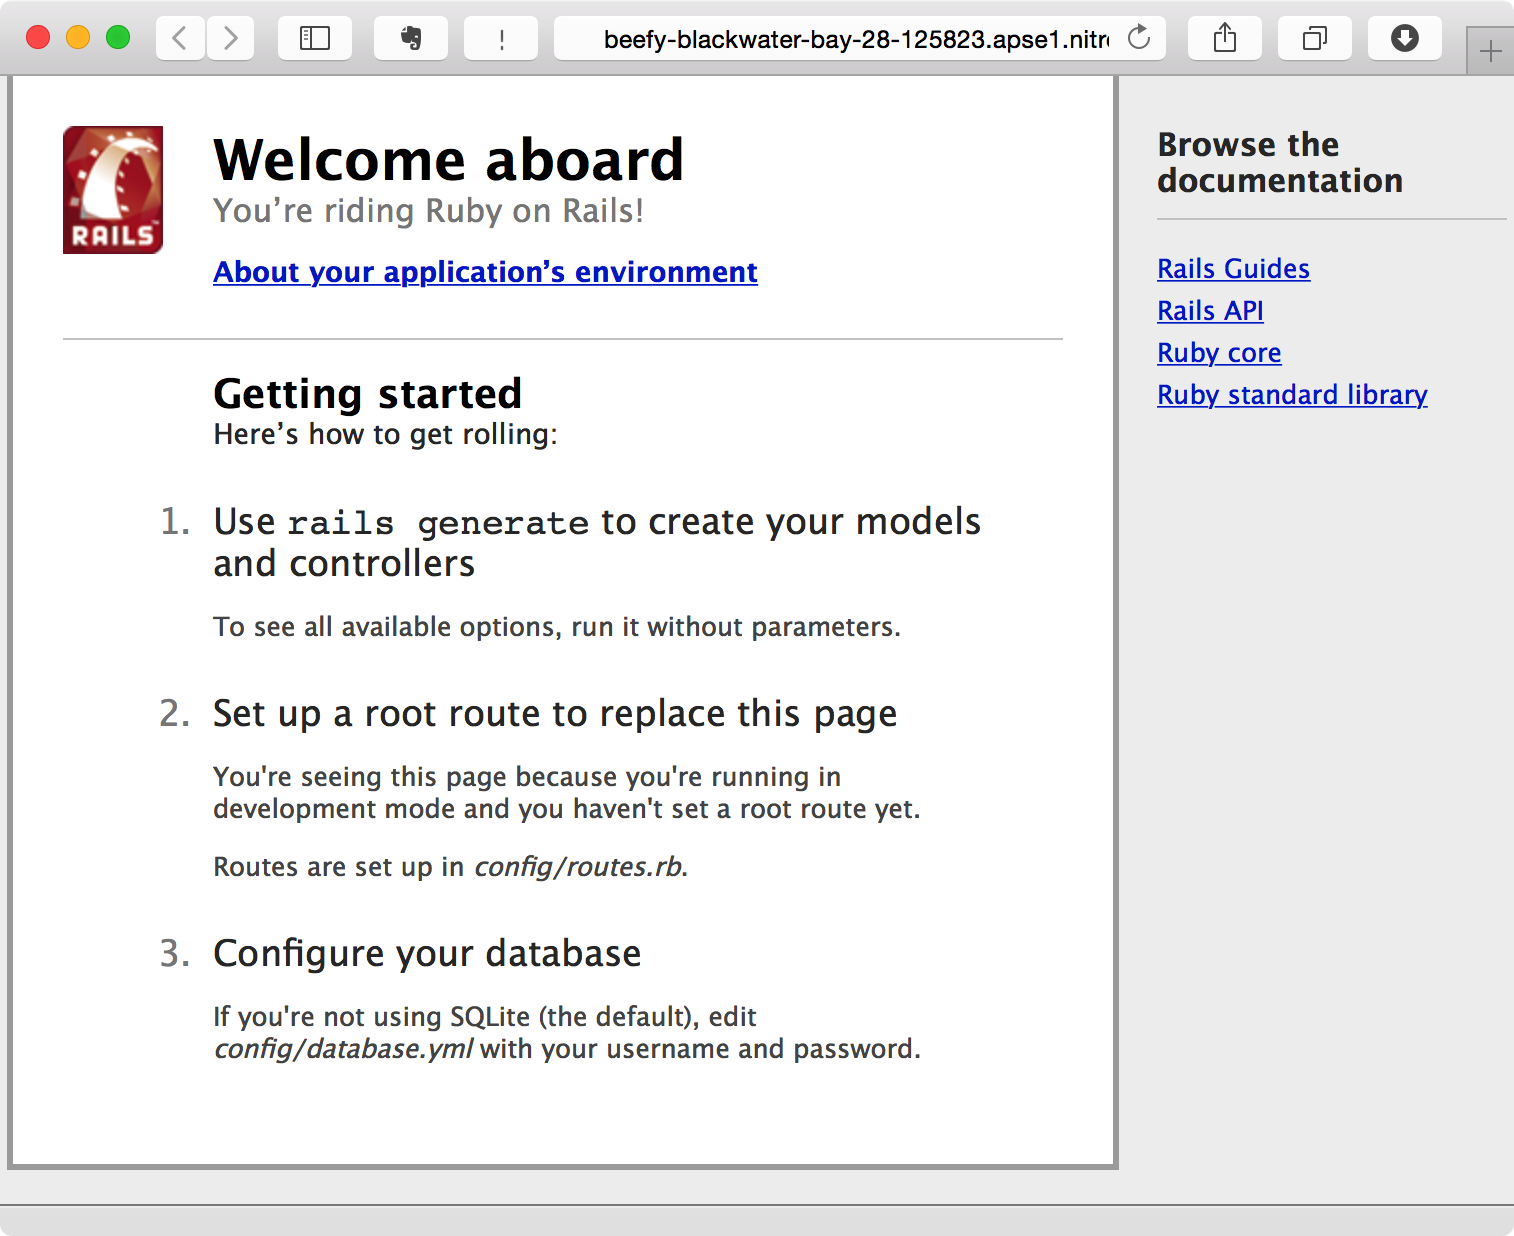
Then we would get the default rails index page.
Note: To stop our server, we can press `CTRL+C` keyboard keys combination.
Scaffolding
The default home page is just a static page. We’ll now create our first resource – Customer.
Step 1: In the nitrous.io console, run the following command.
1$ rails generate scaffold Customer name:string tel:string gender:integer birthday:date
Note, the above command is in one line
Step 2: Then run the following command to apply the database schema changes.
1$ rake db:migrate
Step 3: Start up our testing server.
1$ rails server -p 8080
Preview our web app by choosing Preview > Port 8080.
We still see the default index page. That’s normal. Now add /customers/ at the end of the URL and we should see the following screen.
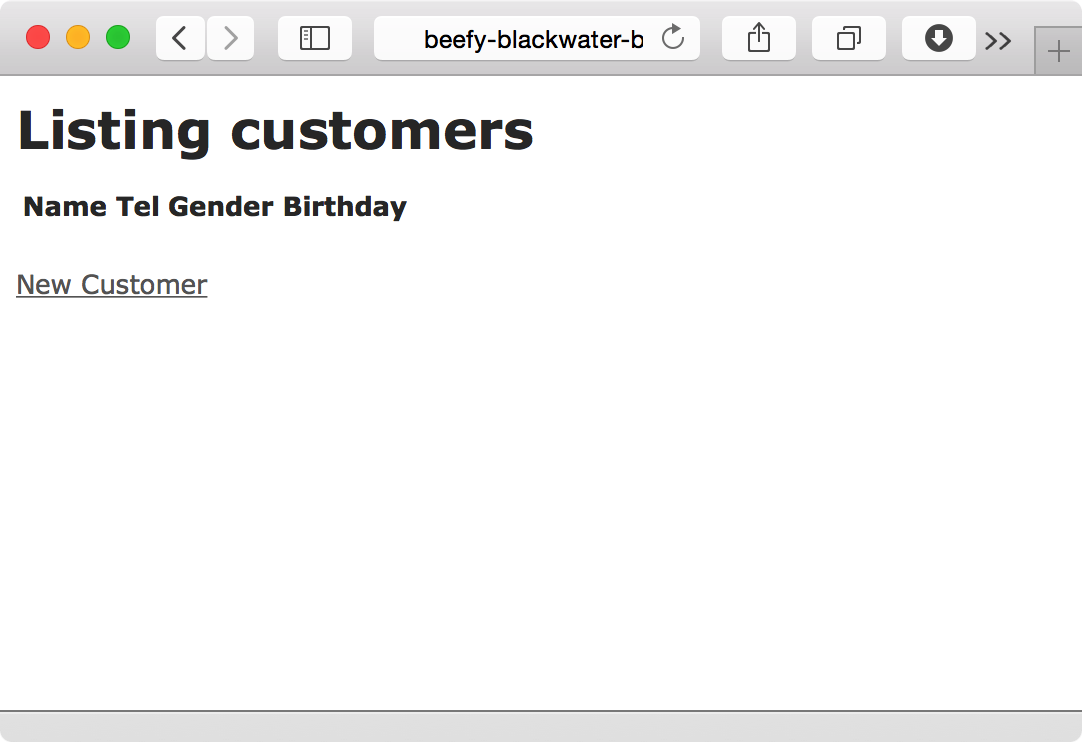
Try click “New Customer” to add a new customer record.
For first time rails developer, the following scaffold command is a good starting way.
1$ rails generate scaffold <ResourceName> <field_name>:<type> <field_name2>:<type>
The command basically tells the rails application that we want to generate a new resource named Customer. Following the resource name, we define some fields to store data. Scaffold is a special generator that let us have the access of the resource in browser immediately. It generates the model, views, controller and databases changes for us, in one command.
The date_select helper
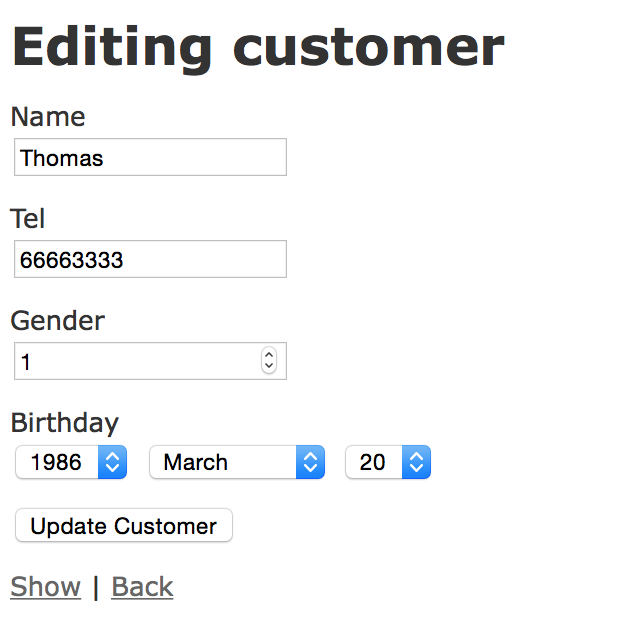
If we take a look at the app/views/customers/_form.html.erb file. It contains the form we need when creating or editing a customer record. In the birthday field:
1<%= f.date_select :birthday %>
The default date_select method shows only 10 years for selection. What we want for a birthday range is obviously more than 10 years. We can provide options for the starting and ending year. But better, we calculate these values based on the curret year. Date.current.year-100 for the starting year and Date.current.year for the ending year.
1<%= f.date_select :birthday, start_year: Date.current.year-100, end_year: Date.current.year %>
You can use 100.years.ago.year to replace Date.current.year-100
Database and migration
The scaffolding command generates several files for us. One among them is a migration file. Migration file are for any database changes. We have a new resource that needs storage. So we need a new table in database to store the data.
After the migration file is created, we need to execute the following command to apply the change to database.
1$ rake db:migrate
This is the output of the db:migrate task execution.
One killing feature in Rails is the versioning of the database schema. This is done by database migration. Each time when we modify the database schema, we recorded the changes in a file.
When the sync the files among developers, each developer has the same synchronized database.
The first thing, we plan what data we need to store and their relationship.
Let's take a look at the migration file rails generated from our scaffold command.
Convention over Configuration
Rails uses convention over configuration. It means that when we follow the naming convention, rails can know what we want to do. For example, a model class Customer assumes the table name in database is customers.
The concept of CRUD
CRUD stands for
- Create
- Read
- Update
- Destroy
For any resource, these 4 operations ane the essential ones.
Routing
The CRUD can be reflected in the routing table.
Here is the routing table for our rails app. We can get the following information by running rake routes in console within our app folder.
| Verb | URI Pattern | Controller#Action |
| GET | /customers(.:format) | customers#index |
| POST | /customers(.:format) | customers#create |
| GET | /customers/new(.:format) | customers#new |
| GET | /customers/:id/edit(.:format) | customers#edit |
| GET | /customers/:id(.:format) | customers#show |
| PATCH | /customers/:id(.:format) | customers#update |
| PUT | /customers/:id(.:format) | customers#update |
| DELETE | /customers/:id(.:format) | customers#destroy |
Usually, the /<resource_name>/ is for listing a collection of resource records.
The /<resource_name>/new is for creating new record.
The /<resource_name>/<id> is for viewing one record with given ID.
The /<resource_name>/<id>/edit is for editing record with given ID.
Note that the <resource_name> above is in plural form.
Managing assets
Remember the CSS preprocessor we introduced in chapter 3 – CSS and new features? Rails uses a concept called assets pipeline, which processes all the assets and serves to client.
Read the assets pipeline for detail assets management.
Where to learn more?
The following lists some resources that you can learn more on Ruby on Rails.
What’s next?
Next, if we are really want to use this app, we need an authentication system to protect our customer data and privacy.
In rails, there are different plugins. They are called gem. There are authentication gem out there. Devise is a popular one.
Note, we are actually 50% completed my planning. We made the Customer resources. We still need the Note resource. Part B of the chapter works on the Note resource.